Showing posts with label DIY. Show all posts

Tuesday, August 5, 2014

Step 5: I'm Not a Girl {Babygirl's Room Design: DIY String Pendant Lamp + Macrame Ombre Lamp Cord | Part 2}

Hello again! If you have been following along, you know we created a string pendant lamp in our most recent room design post and we left it to dry. We were supposed to wait 24 hours to remove the beach ball and reveal the design but life happened so our 24 hours turned into 96 hours! I know... but hey, it wasn't going anywhere, right? Besides, we had a lamp cord to macrame.

(for a list of our upcoming projects, click HERE)

This lamp cord was not only going to be macrame but also have a peach ombre dye. So I got my supplies together:

We have vaulted ceilings in our home but the ceiling height where this lamp was going to hang is the average 9-feet high. Since this will be a swag lamp, I needed it to go up from the top of the lamp we were creating, then up to the ceiling and back down to floor and over to the electrical outlet. A total of about 20 feet. The IKEA lamp kit is about 15-feet. Therefore, I added an extension cord (not pictured) to make this happen.

As stated, we went with the more modern looking cord kit at IKEA. For $5 each, you just can't go wrong. And although they are modern-ish, we still felt it was kind of ugly as it was. And we are also not huge fans of cords running through chains. In my search for a cool new idea, I decided to channel the 70s when my grandmother, aunts and mom used get together and macrame their hearts out. Then, I came across THIS macrame tutorial on tying a spiral knot. I simply used the cord as my two inner ropes.

1. The first step was to get this rope braided. I was so proud of myself. Once I got the hang of it, I was a macrame-ing machine! Still, in all it took me 5-6 hours total to get the cord braided.


2. Next, it was time to dip dye the cord to give it an ombre effect. I used a sandwich bag to place over the electrical plug and taped it tightly shut with duct tape. Mixing together hot water, a 1/4 cup of salt and 1/2 teaspoon of RIT dye in Tangerine, I immersed the cord for the length I wanted the color to go up and immediately removed it. Then I dipped the middle for about 60 additional seconds and the bottom for another 30-40 seconds. That was all it took. That dye is pretty powerful. Outside it went to dry. It came out pretty cool!
3. And now... the moment we've all been (or at least my daughter was) totally waiting for... removing the beach ball! We deflated the beach ball and then realized that the beach ball was not the best choice. Given the chance to make this again, I would probably use a balloon or a punchball so I could puncture it with a pair of scissors and yank it right on out! Since the beach ball was covered in vaseline, it was hard to grasp and deflate. We had to work hard to get it out of the string ball but hey... hindsight is 20/20.
You guys, I'm not going to lie. It was both thrilling and incredibly satisfying. The light and airiness of the finished project, and the fact that IT WORKED! It looked totally legit! In fact it was.... too legit!
At some point I may replace the energy saver bulb with a vintage filament but my daughter likes it this way... We shall see.

I used an old toothbrush to clear out some of the dried glue mixture that didn't break free with the ball. Then, I outfitted the cord kit with a clear plastic food container (you know the ones you put salsa in to-go at the restaurants). I cut the bottom off and placed that on the lamp kit to give it a little more width and ensure the lamp kit wouldn't slip through the lamp later on down the road. I totally forgot to take a pic for you but if you have questions about it, please ask. I am happy to answer you in the comments below.

We hung that bad boy up with ceiling hooks and felt the awesomeness because we did something totally rad! (decided to go back and paint those ceiling hooks white soon).

Of course next comes the big, payoff, moment-of-truth when you plug in your awesome string pendant lamp masterpiece and HALLE-LOO! The design angels rejoice!
If I can do this with a cranky 13-year old kid, you can too! It's such a gratifying experience to make cool things for your home. We sure hope you find our posts inspiring.

Next up we plan create a DIY Dreamcatcher for her wall. Stay tuned...

xoxo

Tuesday, July 29, 2014

DIY A Year's Worth of Dry Laundry Detergent for $60 + Review

9/9/14 UPDATE: I made half a batch of this soap and we ran out within 2 months. We used more than the 2 tablespoons per load recommended. I think we were using at least 4 so we used twice as much. Meaning this should have lasted 4 months instead of 2. I think 2 tablespoons might be too little so we are meeting in the middle and decided to use 3 tablespoons and see how far it stretches out this next round. Yet and still, we do a lot of laundry in our home and were averaging at least $35 a month between commercial soap and fabric softener. Even at 2 months we are averaging about $15 a month which is a huge savings. Also, our old washing machine broke down on us. So we purchased a new LG High Efficiency Top Loader from Home Depot, which washes our clothes much better. Will provide another update when the second batch runs out.

A YEARS worth of Laundry Soap? Yeah right! Although the idea sounds awesome in theory, it was hard for me to get my mind wrapped around the concept! But I have been more than curious about the “dry” version of homemade laundry detergent that so many people are raving about. I've always wanted to try it so while I was on stay-cation this month, I figured it was a good time to give it a try. So I did!

I got the recipe from Liz Marie's blog, where she not only claims this is the most amazing soap ever, but also that it really did last her a year! WOW!

I continued to do my own research online and took the time to look up each of these ingredients to see how effective they are in cleaning laundry. When I was done with my research I was actually shocked at what I had discovered.  Reading all the materials on the ingredients for homemade laundry detergent made me feel confident to use it in my own home because I think any of these ingredients on their own would clean our clothes efficiently but when you add them all together they make an incredibly efficient detergent with maximum cleaning power for all types of water. And it's safe to use in standard machines or HE machines! YAY!

So here is what you will need:

Although you may be able to find these items in your local store, I prefer to take advantage of my Amazon Prime membership at every chance possible. Not only was I able to get these items with free shipping, some of them were at an incredibly low price as add-on items.

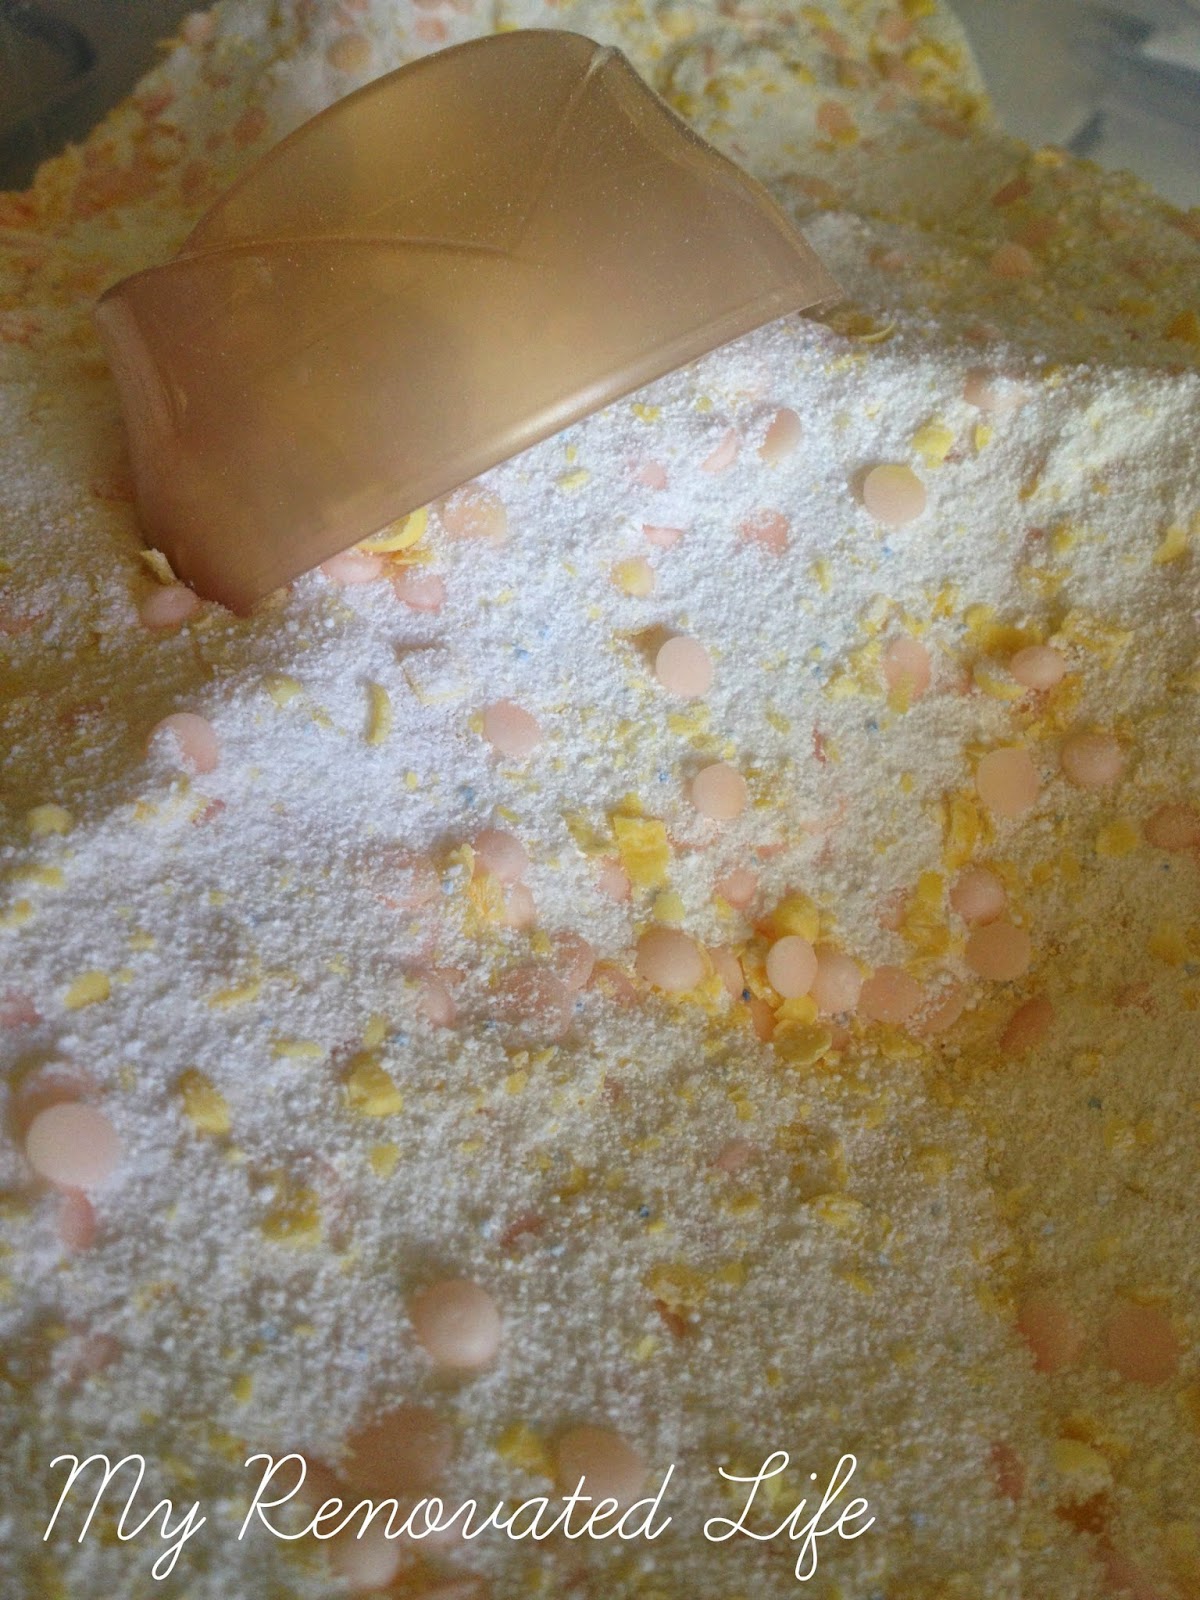
To start out, I grated the bars of soap. You are more than welcome to use a food processor but I decided to be all domesticalistic and do it using an old cheese grater I had in the kitchen. I would offer one tip though if you decide to use your food processor to “grate” your soap: add something else to the bowl to aid in the process like a cup of the Oxiclean to each bar when you process it. It will help the blades do their job better.
ANOTHER TIP: This makes a LOT of soap. So I found the easiest way to mix everything up was to toss it into a garbage bag, tie it off and toss it.  Now you have a boatload of soap they say that it will last a family of four at least a year.

Be sure to store your soap in air-tight containers. I picked up a couple of THESE from Amazon. I love that it has 4-locks.

When using the detergent, you'll want to start your washing machine, let it fill up a little with water, and then add your 2-3 tablespoons of detergent before adding your clothes. Keep in mind that this detergent will not suds up or bubble, but it will get your clothes so clean you won't believe your eyes. And with the Downy Unstopables, my clothes are smelling cleaner and better than they ever have before.

It can also be used in HE machines because it has no sudsing agent. If you have a high-efficiency machine, be sure to mix the detergent with a little hot water before adding to your machine's dispenser.

SIDE NOTE: We are a family of two...well, three if you count our puppy, Kai. I personally think we go through more than your average laundry because I wash everything all of the time, so I am not expecting this batch to last a full year. But based on my initial use and recommended amount of 2 tablespoons per load, it's going to last us a good long time.

BENEFITS:
{photo via askannamoseley.com}

I will do my best to check back in with you at a later date to update you on how long the detergent is lasting. If you have DIY'd your own detergent or are joining the bandwagon and are going to give this a try, please comment and let me know about your experience! 

xoxo

Tuesday, July 22, 2014

Step 4: I'm Not a Girl {Babygirl's Room Design: DIY String Pendant Lamp + Macrame Ombre Lamp Cord | Part 1}

Hey there! We are so incredibly excited to have the walls painted. Initially, we were going to stencil a cool design behind the bed but my lovely babygirl changed her mind. Since turning 13, I have noticed that her mind changes quite a bit and that I need to exercise more flexibility than I usually do! Ah.... teenage parenting... so fun!

(for a list of our upcoming projects, click HERE)

Where were we? Oh yeah, the walls. So now that the walls are pretty, the next project we moved forward on was installing a pendant lamp in the corner where her armchair will eventually go. The first idea was to DIY a feather pendant lamp. However, we are on a budget and buying the ostrich feathers for a lamp was turning out to be quite cost prohibitive. So we scoured the internet and babygirl settled on another super cool but more economical lamp project... a String Pendant Lamp. YIPPEE! I loved this idea so much. Plus we had 90% of EVERYTHING to make this project in our home. So the cost = $ LOW!

A while back we both fell in love with a string light fixture that we saw in the window display of Anthro, so this was a perfect opportunity to bring that design into our home.

What you'll need for the string pendant:


We went with a beach ball because Babygirl didn't want a really large lamp, but I have seen DIYers who have used exercise balls (36" round). You can go smaller or larger than what we are doing. It's totally up to you and what fits into and looks best in your space.

INSTRUCTIONS:
1. Inflate the beach ball and, taking your Sharpie, draw a circle a little larger than the size of your lightbulb. It doesn't need to be perfect. This is where you will insert your cord kit. We drew our circle around the air valve to make it easy to hang and to make it easy to deflate later. Next, you want to rub vaseline all over the rest of the beach ball. This prevents the string from adhering to the beach ball when it's time to deflate it.

2. Hang the ball so that it's not touching anything. (We tied a string to the air valve on the beach ball and hung it from a spare closet rod between two folding chairs. I also HIGHLY SUGGEST covering your work surface with newspaper or a drop cloth or old sheet to protect it. The old sheet we used had decoupage glaze all over it by the time we finished.

 3. We didn't really measure out the glue mixture. Basically you want to pour the entire bottle of Mod Podge into a mixing bowl, add a handful of cornstarch and then slowly add water until you get the consistency of coffee cream. VOILA! So profesh, right?

4. This project definitely takes two to tango - even if you have it hanging. To get started, you want to pull out a length of string from your yarn ball and tape the end of the string near the top of the ball just inside the circle you drew. We will cut this away later. Now place the rest of the yarn ball directly into your glue mixture.

5. Starting the design can be a little tricky, but once you get going, it's simple and fun. I recommend getting your fingers a little wet with the Mod Podge to get started. Ultimately, you want the yarn to have a cool, chaotic look. But to get started, I recommend doing a bunch of vertical wraps until you feel like things are pretty secure. Don't be afraid to pull tight into the beach ball a bit.

6. Babygirl and I each took an assignment: I held the beach ball still, while she wrapped as intentionally chaotic as she wanted to. After all this was her lamp so it needed to be her creation.

7. She took a step back several times to gauge how it looked. You don't want to under-do this, but you don't want to over-do it either. At some point you'll hit the sweet spot and you'll know it. That, or your back will be so tired and your hands will be so sticky that you'll cry uncle and conveniently be at a happy stopping point. You know either way.
8.Let it dry a full 24 hours. I periodically checked it for "soft spots", re-coated those areas with a foam brush and gave it another 24 hours after that. It is worth making sure all of the yarn is really good and hard.

WOO HOO! We can't wait for this to dry so we can hang this bad boy! Next up we will be creating an ombre lamp cord to hang this awesome lamp. I know you want to see the finished project, dontcha? Yeah you do... so to quote the Beverly Hillbilies... "Y'all come back and see us now, ya hear?

xoxo

Monday, January 9, 2012

The Vintage Schoolhouse Swivel Desk Chair

I LOVE the schoolhouse swivel desk chairs that are sold by Pottery Barn. They remind me of the chairs the teachers and librarians sat in when I was a kid. However the price has me cringing. They are asking $399.00. I don't know about you but I can't even begin to justify spending that kind of money on one wooden chair. Especially one that is a remake of an original design.

So...what's a girl to do? Renovate of course!

But where do you get a vintage schoolhouse swivel desk chair without paying an arm and leg? I'll tell you where I found mine. In the alley! Someone actually threw their chair away. Imagine how my eyes bucked open when I saw it. Discarded, unloved and tossed out like a bad habit. It's been painted who knows how many times, adorned with loads of rocker stickers and the casters are completely gone. Poor chair...

But as I have said before...one man's trash is another man's treasure. I had my daughter drag this baby into the house. The family looked at the chair. Then they looked at me. And then they said... "Mom, you can't be serious. This is ugly and it's short."


Oh, if only they knew the treasure that lies before them. This is not a chair "inspired by"... this is the REAL DEAL. It is still in great condition. It's sturdy. The wood is not warped, split or bent from what I can see. I sat in it, swiveled in it and even tried to rock it back and forth to make sure it wouldn't fall apart on me or have me flat on my butt from falling over. Guess what? It passed the test!


{YAY! The crowd cheers. The crowd being just me because the kids still think I am crazy.}

This is going into my home office/workspace. I plan to remove the stickers, strip the paint, sand it, repaint it in white, sew up an aubergine seat cushion or two, add new casters and roll it right up to the table desk that I recently completed!

Wonder how long this will take me. Let's find out together. Follow along as I share my process. I'm super excited!!!

Tuesday, December 6, 2011

Workspace: Spray Painting My Desk


I have really grown to love Craigslist. It is a cornucopia of unwanted items. Every now and then you come across an unusual and perfect item. And that is exactly what happened when I found my table desk.


I needed a desk that could fit into the little workspace nook that I painted in my living room. And I wanted something that had enough surface for my laptop and a few desk accessories. I didn't care for drawers and it had to be made out of wood. I wanted something that could be painted white so it would really stand out and pop against the chocolate swirl paint that I added to my workspace.


So the hunt on Craigslist began. I had my eyes out for a table desk and that is when I found this beauty. It was only $25 and it was being sold very close to my home. If you have ever lived in or been to expansive LA, you will understand that proximity can make or break a good deal!


It was perfect. It had curvy legs in the Queen Anne style, some unique carvings on the legs and was being sold as an illusion table. It has the unique ability to look as it were coming out of the wall.


I brought this baby home, decided saw that it needed additional sanding before I could paint it white. So, what does a girl do? She heads out to visit her favorite DIY friend, Home Depot!


This was shaping up to be another inexpensive project. Between the actual desk and the supplies, this total came to $42.86. Not bad!


First things first, I needed to protect my area with a drop cloth. Then I sanded the surface to remove any polyurethane and to provide the paint something to grab once applied. Once I finished sanding, I used a tack cloth to remove any excess sand and sawdust. This is the best way to rid of any debris and provide your surface with a smooth finish for painting.


Then I needed to repair a split in the leg with wooden filler and allow it to set for at least 24 hours. Afterwards, I sanded it down to give it a smooth finish.


To ensure a successful painting job that resulted in a durable finish, the table desk was then covered with a layer of Rust-Oleum Primer. Now the table desk was ready for it's first coat of paint. I used a can of Rust-Oleum Ultra Cover spray paint. Be sure you are wearing a mask to protect you while you prime and paint your furniture.


I ended up putting four coats of paint before I was satisfied with the coverage. I love how the details stood out once I painted it white. And it looks really good in the space. As you can see below, there seems to be a little variation in shade on the top, but that simply the light bouncing off of the wood grain, creating shadows.

NOTE: In hindsight, I probably will not spray paint again. It was very messy and the toxins in the air were way too strong.


I am really starting to love this area so much! I can't wait to accessorize and add some lighting! Perhaps then my photos will come out a little better!


So...what do you think?


xoxo, tami