Monday, July 9, 2012

Summer Bucket List 2012: Hollywood, Michael Jackson and Ice Cream


It was June 25, 2012 and it was three years to the date that the world said goodbye to the King of Pop. We decided to head on out to Hollywood to see his star and his hand and footprints.


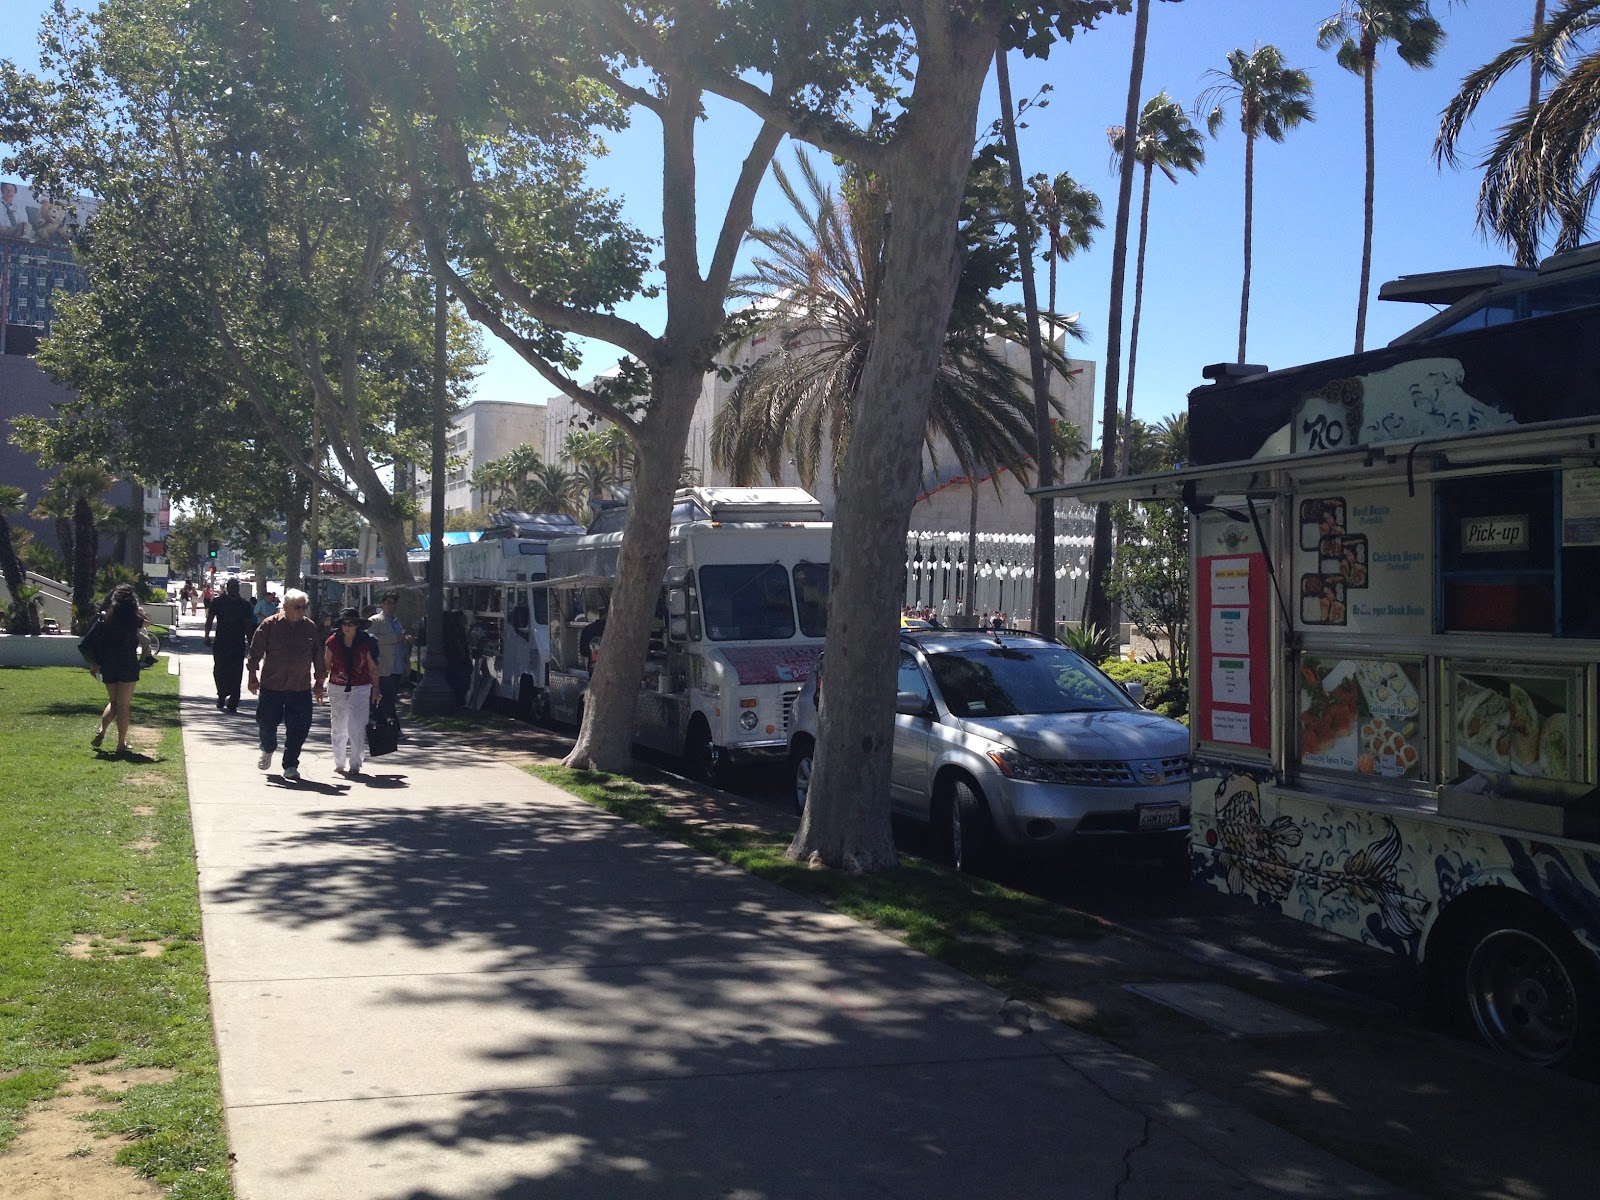
We took the Metro Red Line because it's just plain easier. If you have ever been to Hollywood, you are probably familiar with the crazy traffic, the tons of pedestrians, the lack of free parking and the uber expensive parking structures in the vicinity. So off we went to Hollywood and Highland via the Red Line.


The first thing we encountered was a man, his guitar and his trusty dancing puppet. Gotta love LA.


Upon our arrival, we headed straight to Chick-fil-A. It's the only one in a 25 mile radius and therefore a rare treat for us. Waffle fries! Nom nom!
Hollywood and Highland is a very interesting hub of activity. Here you can meet a slew of folks dressed as your favorite movie characters, meet a host of anti-abortionists with picket signs and flyers, hang out with the homeless, get in lots of shopping, eat until your hearts content and peruse the stars of the rich and famous on Hollywood's Walk of Fame. It's also the home of the famous Kodak Theater (you know, the place for the red carpet and the awards shows) and a gazillion souvenir shops.

So what did we do? Shop! Hey, we live in L.A. There is nothing here that we haven't seen before. Here I am in the dressing room with about fifty-eleven different outfits. I even bought a few including this cute chevron top!
We ate Big Fat Ice Cream Sundaes at Cold Stone Creamery... it is part of our Happy Family Movement Summer Bucket List, ya know. 
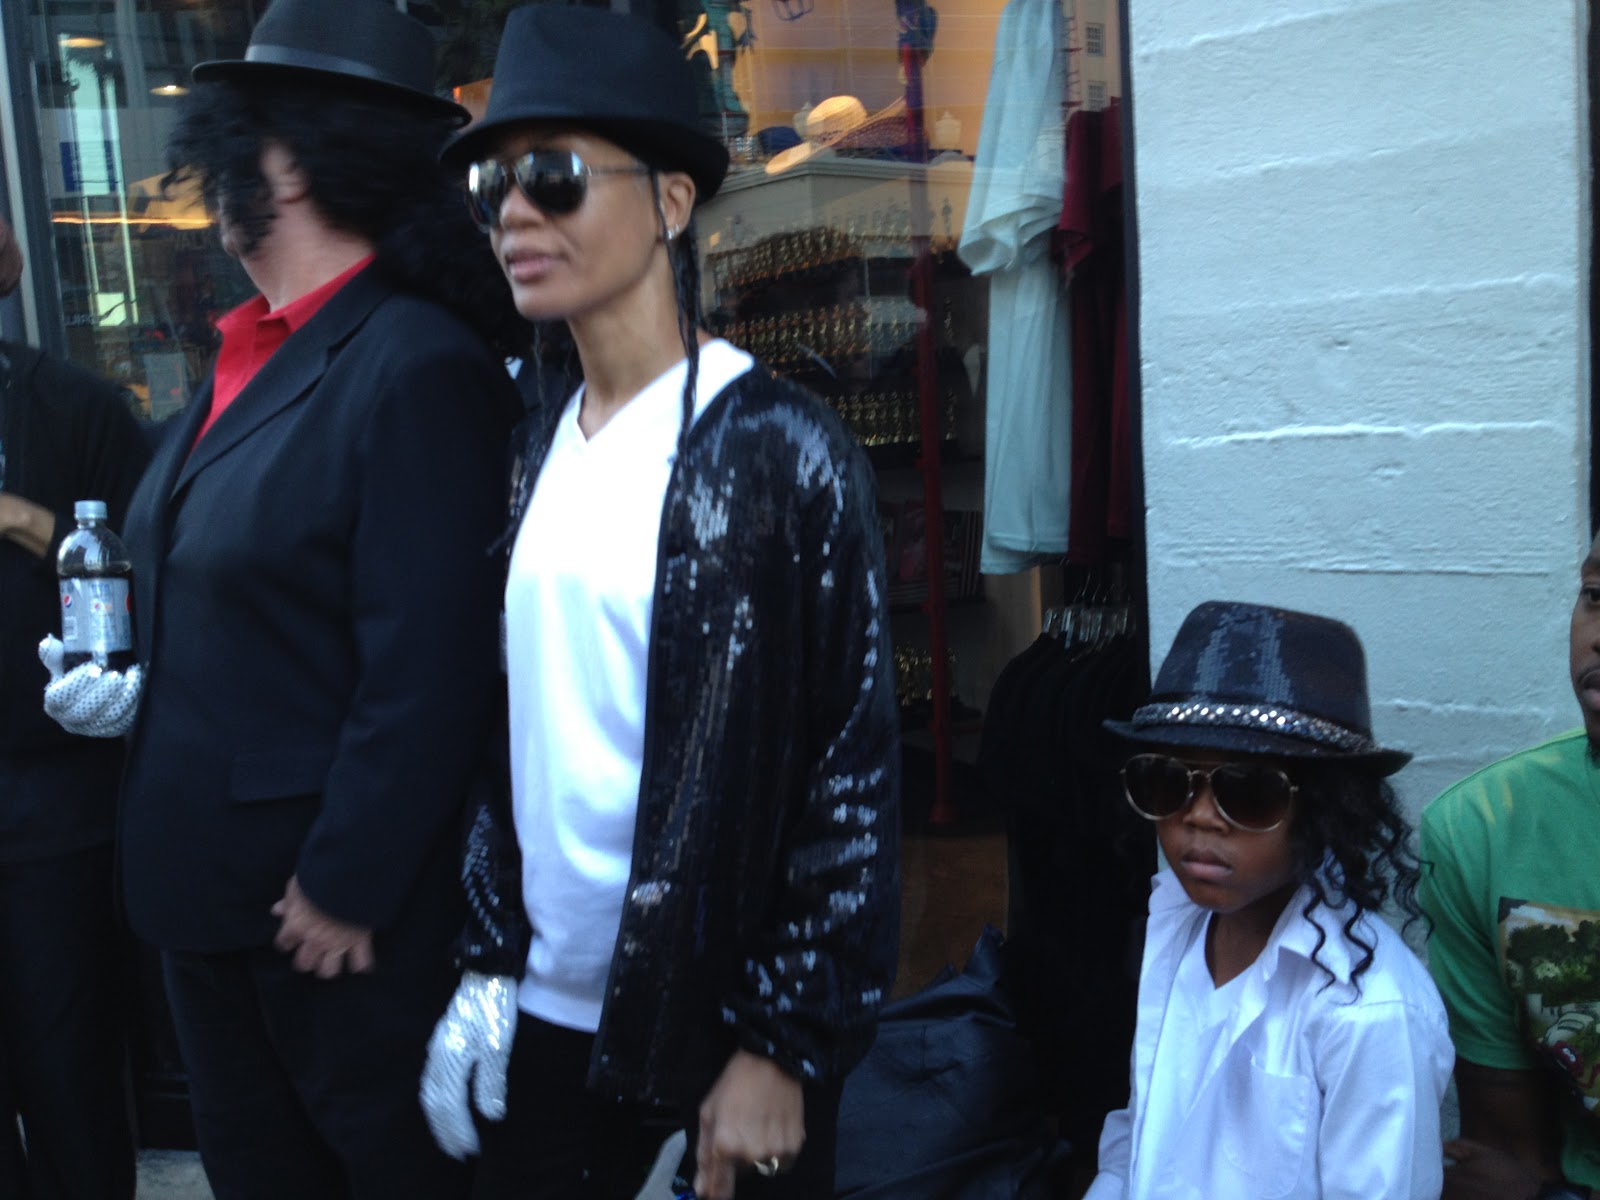
And the MJ fans were out in style! We headed over to see his star and his prints in front of the Chinese Theater. Mind you, there were so many people out and so many dressed up like MJ, I couldn't possibly capture it all, but you'll get the drift.
This guy looked most like Michael Jackson, but still not quite... and when we tried to take a picture with him, he asked us for money. (I guess he needed to earn back the money he paid on plastic surgery. Yes, he has actually had surgery to look like MJ! Talk about being a die hard fan!) Um...yeah we snapped this when he thought we walked away. Oh well.
We stepped on over to the front of the Chinese Theater where you can see the hand and foot prints of many stars, but we were only interested in Michael Jackson's.
So funny because once we were spotted taking this pic, a random stranger dressed like MJ decided to lay on the ground next to his prints...and she didn't ask for money! And come to think of it, I am not even sure these are MJ's actual prints. What can you do? It's a typical day in Hollywood. All illusion and grandeur.
Did I mention that Hollywood is full of interesting things to see?  What many people don't know is that Hollywood is not the place to be if you want to spot a real celebrity. And it's not as glamorous as it looks on TV during the award shows. It's actually quite busy and dirty most of the time but it can be a fun place to visit if you are a tourist and a nice outing to take every now and then if you are a local.

So that was our mini-field trip. We weren't gone for long but it was a nice little break in the middle of our day to enjoy a part of the city usually appreciated by tourists more than locals.

To learn more about the Happy Family Movement Summer Bucket List Challenge, you can follow them HERE on Twitter

See you next time!

xoxo, tami

Tuesday, July 3, 2012

Summer Bucket List - LACMA

We kicked off our summer by crossing off "Rooftop Dinner" from our Happy Family Movement summer bucket list a couple of weeks ago. I promised my kids we would move full force on the bucket list this year and I intend to keep my promise. So the next thing we decided to do was head on over to LACMA with a pit stop at the food trucks that are always parked across the street.
About 2 years ago I discovered a food truck called the South Philly Experience. I have had MANY "authentic" Philly Cheesesteaks only to be majorly disappointed, but trust me when I tell you...this is the REAL DEAL! So of course, the choice was easy for me. One Philly Cheesesteak "wit" onions please! Add broccoli rabe!!! Nomnom! Seriously...you NEED to hunt down this food truck.  It does not disappoint! {Matter of fact, I think I need to hunt it down again soon!}
After we chowed down, we headed around to the backside of LACMA where we could hear Latin music playing. People were camped out in the grass all around a stage area, a DJ was playing music and a whole host of Los Angeleans were dancing to the beat. How fun! {I completely forgot to take a picture or video of this, but it was quite fun to observe!}

Next we headed on over to the box office. Kids under 17 generally visit for free, adults are $15. But as I spoke to the box office attendant, I quickly learned that we could both visit the museum for free! How, you ask? Well,  there is a really amazing program at LACMA for kids called NexGen. With this program, you sign up your child and they receive free general admission and so do you as their accompanying adult. SWEET! This was turning out to be a lesser expensive outing that I planned for. CHA-CHING!

My little girl is so silly on the escalator!
We really enjoyed the art installation by Chris Burden entitled Metropolis II. It's  an intense kinetic sculpture, modeled after a fast paced, frenetic modern city. Hot Wheels are set in motion to zip through a dense network of buildings. The noise, the speed and the constant flow produces in the viewer the stress of living in a bustling 21 century city, much like Los Angeles. What a unique experience!


We decided to save some of the other exhibits for another day. What a fun day out with my little girl. Hoping next time, that my adult daughters will be off work to have a good time with us as we venture off to Hollywood!

To learn more about the Happy Family Movement Summer Bucket List Challenge, you can follow them HERE on Twitter

See you next time!

xoxo, tami

Monday, June 25, 2012

Renovating Ideas: Elevated Envelope

This Spring I participated in a really fun envelope exchange movement called the Elevated Envelope created by the lovely Tara Bliven. But this isn't your average envelope exchange. No way jose! This is an explosion of artistic creativity. Pushing yourself to create a masterpiece within a set number of guidelines and mailing it to the other participants within your assigned group. Here is more background on the Elevated Envelope.

So, I signed up. Why not? I love doing things to stretch myself. There was only one issue and it was a big one. I signed up smack dab in the middle of a legal dispute with numerous court dates with the management company of my apartment building. I also proceeded to begin looking for a new place to live. I had a baby shower to design AND I was working like no tomorrow in my business. But I REALLY REALLY wanted to participate in the exchange and I was committed to make it happen. And make it happen I did. It was something cute and simple with a nod toward my wedding design company's branding. I was quite pleased.

But when the envelopes started rolling in, I knew I needed to BRING IT next time around.

Nevertheless, here is what I created:
Now check out the lovely envelopes I received... LOVE EACH AND EVERYONE!
I had so much fun with this. I am definitely participating again in the near future. How about you join me?

xoxo, tami

Tuesday, June 19, 2012

Renovated Lifestyle: Annual Summer Soiree 2012

This year I threw my first Summer Soiree. It's an all ladies intimate themed dinner party with just a few of my dearest friends colleagues and a few family members. This is a time to get together and celebrate being women. I decided to kick off this annual event by honoring Frida Kahlo.

I started off by teasing my guests with Save-the-Date cards intended to set the tone without giving too much of the theme away.
{Sorry about the grainy photo... photo credit: tami briggs}
Next I handcrafted an invitation. The invitations were completely handmade. No printer used. In fact the only machine involved was our wonderful sewing machine. A little fringe, some bright colors and flowers and a handwritten message invited select guests to come out and partake in some good food, great drinks and lots of laughter on the rooftop of my apartment building.
{Photo Credit for invite: Just Wenderful}
{Photo Credit: tami briggs}
All of the ladies were excited. But not nearly as excited as I was because up until now, I am still the only one who knows the theme and menu for the event.

I sewed up my own table runner and table linens, bought a few potted kalanchoe and succulents, hung fringed streamers and lit a few candles and we had a dinner party.
{Photo Credit: tami briggs}
Each guest found their name painted on oil pallets, which I fastened to the chair backs with raffia. And they each received a personal succulent to represent life in a dry spell and a unique card with a photo of Frida Khalo and along with one of her quotes on the back.  Don't you just love the really cool looking light fixture hanging in the gazebo on my rooftop.

I made a BIG batch of sangria {it was a hit}!
{Photo Credit: tami briggs}

I chose to make it a tortilla bowl buffet so that guests could build a bowl or two to their liking. On the menu we had:

Fresh baked tortilla bowls
Cilantro Lime Basmati Rice
Chili Beans
Salsa Fiesta Shredded Chicken
Ropa Vieja (Shredded Beef)
Carnitas (Shredded Pork)
Sauteed Vegetables
Avocado and Grilled Corn Pico de Gallo
Fire Roasted Salsa
Pineapple Mango Salsa
Guacamole
Sour Cream
Shredded Lettuce
Shredded Cheese
Sweet and Spicy Pepitas
Sangria
Tres Leche Cake
Spicy Cinnamon Chocolate Brownies
{Photo Credit: tami briggs}


This was about honoring one another as friends, celebrating the power of femininity and embracing our womanhood.
{Photo Credit: tami briggs}


My sister graduated UCLA just the day before and is taking off for Norway to attend the summer program at Oslo University. So it was only fitting that I make a toast in her honor and present her with a beautiful and unique locket from Origami Owl.

We had such a great time and I can't wait to do it again next year!

Cheers!
xoxo, tami

Monday, June 11, 2012

Renovating Ideas: Drop Cloths

We all know how costly fabric can be. There are a lot of great deals to be found in the Los Angeles fabric district, but what if you don't have access to a place like this? If you are looking for a very natural and organic look, I'd like to introduce you to drop cloths.

Yep, I said drop cloths. The fabric cloths that painters use. What makes drop cloths so attractive for home decor is that you can actually do some pretty cool things with them and you get a heck of a lot of fabric for a low investment.

Drop cloths can be found at Home Depot, Lowe's or many other home improvement or paint retailers. They come in a few different sizes and in two different weights. If you choose to work with drop cloths, you don't need to purchase a heavy weight unless you are creating a project that requires a stronger fabric. I hear that drop cloths from Home Depot have a seam down the middle of them and the ones from Lowe's don't. I am not quite sure what that may or may not mean to you but if having a larger piece of fabric is important to you, than it may be wise to purchase yours at Lowe's. A drop cloth of 6'x9' runs approximately $10.00 each. The size is an estimate. Please be sure to check the packaging for the exact measurement in fine print. I want to say a 6'x9' is more like 5 5/8'x8 5/8'. This is important to note if you are looking for exact measurements. Also, these cloths aren't cut in a perfect rectangle. It's very possible that you can lose a few inches in length from one corner to the next. There are red and blue threads that run through the fabric and not all drop cloths are the same shade of beige. Be sure to check all of these small possibilities when selecting your drop cloths.

I traveled around the world wide web to find a few gorgeous home items that were creat with drop cloths. Just look at how lovely drop cloths can be:

What a great way to use an unexpected medium in a really beautiful way!

xoxo, tami

Tuesday, June 5, 2012

Summer Bucket List - Family Time

I am so excited that summer is upon us. My youngest daughter is still in school for a few more weeks but that's not stopping us from beginning our summer activities. Every year I plan activities for the kids and I to do fun things but this year we are joining others across the nation in the Happy Family Movement.

We are participating in the Summer Bucket List Challenge! So fun and so exciting! The first thing we did was create a bucket list of things we wanted to do this summer. Collectively we agreed to several activities that were decided upon in our family meeting. Babygirl then took on the job of creating a display for our kitchen where we could visually see what we have planned. She's pretty creative, don't you agree?

Here are the things we have planned:

  • A trip to Universal Studios to celebrate babygirl's 5th grade graduation
  • A day at the beach
  • Buy big fat ice cream sundaes
  • Have a picnic at Griffith Park
  • Visit the Cleopatra Exhibit at the California Science Center
  • Buy Slurpees
  • Train three times a week as a family for The Color Run in San Diego this fall
  • Go bowling
  • Go ice skating
  • Go to the movies
  • Have dinner on the rooftop
We've already started our 5K training and are really enjoying our time spent together.

(all graphics belong to the Happy Family Movement)

What plans do you have with your family this summer? I'd love to know!

xoxo, tami


Wednesday, May 30, 2012

Renovated Schoolhouse Desk Chair

Well, well well... It's only been about 8-9 months since I had my daughter drag the schoolhouse chair into the house from the alley behind my old apartment. I was initially going to strip it and paint it white just like the pretty ones sold at Pottery Barn. But as you know, I'm headed into my inspired design of Edison Travels, I've decided to keep the wood in a natural state and give it an aged look such as seen in reclaimed wood.

I was so excited to begin! You have no idea. I waited so long to get this started. The weather is perfect and the rooftop offers the perfect location for an ambitious project such as this. Great sun, good breeze and amazing views! Can't ask for a better workroom!

Now let me just pre-empt this post by informing you this is my first refinishing job. I am pretty proud of the results but I know there are some "experts" out there that may pick apart my methods. Hey, you do you and I'll do me and we can all live happy, happy. I give you this to think about before you commence to giving me loads of criticism...ahem, advice.

I swear I ran off to Lowe's and Home Depot more times in the last two weeks than I've ever gone in my lifetime. And guess what? I actually love it there! That's right, ladies, it's not just a guy's store. However, it is the kind of store you can drag your husband to and he'll actually be happy as a clam to be there!

Before I take you on a journey through pictures, let me share with you the lovely before photo.

If you are interested in the back story of how I came across this chair for FREE, be sure to visit my previous post HERE.

Applying paint stripper was the easy part. Wearing gloves and a mask, I liberally brushed Citristrip all over the surface of the chair, being sure to reach into every nook and cranny so I could get a good clean finish.

Citristrip states to leave it on at least an hour and up to 24 hours but it was ready for scraping within 20-30 minutes. I couldn't resist. It is back breaking work to scrape the chair. Not because the paint is resistant. On the contrary, the paint was coming off like butter. But the bending over and under and sideways was killing my back. This is where I really wished I had a workable to set the chair on so I could have stood upright. OUCH!

{Bubble bubble toil and trouble. The Citristrip is doin' it's thang!}

{After the first application. The stickers need more elbow grease and the paint is at least 4 coats thick and is clinging onto the wood like a baby to it's mama.}

{After the third application. The paint is gone but lo and behold, big surprise *sarcasm...there is yucky varnish under there! EW!}

{WHEW! With the varnish almost gone and the wood fairly dry, it's time to sand, sand, sand. Just look at the nasty varnish! YUK!}

As you can see from the photos above, it took 3 coats of Citristrip to finally reveal the beautiful wood underneath. My back was crying out but the chair was singing, "I can breathe!!" I even imagined it telling me thank you and we bonded and became one. At this point I vowed to the chair that I would never cover it with paint and that I would endure backaches just to show it how much I loved and admired her.

Seriously, she was covered in rocker stickers on top of deep red paint on top of gold paint on top of black paint on top of varnish! BLECH! Suddenly I noticed her arms and decided they were quite sexy. (Yes, during this meditative process she took on a personality and became a girl.)

Maybe I was breathing in too many chemicals! Either way, I discovered that the chair had a number on her backside and that little discovery was extremely exciting to me. Like, I actually became giddy! Or maybe that was from breathing in the chemicals too! At this point who knows. All I cared about was getting it done.

All in all the stripping alone took a total of 6 hours. Yep, there went my Saturday. I stopped and gave my back a break for the night and came back to sand her down a couple of days later.

STOP: this was going on while I was stripping the varnish:

Too bad I was too busy to notice the solar eclipse but hey...I was in deep concentration over here! Or maybe I simply forgot because I was breathing chemicals for the second day in a row.

{Oooo she's nakey! But what a difference. I used four different grits of sandpaper. The higher the grit number the finer the sand, yielding a smoother finish. I started with a course grit 80 and ended with a baby soft grit 400. I sanded this by hand but I learned a tough lesson. After experiencing multiple hand cramps, I decided a sander will be entering my life sooner than soon. But she was finally stripped bare! Ooo la la, hello naked lady! I left her in all her bare nakedness to dance in the light of the moon while I ate beef stew, had a glass of Pinot Noir and immersed myself in episodes of Scandal.}
I returned on Monday evening to wash her down with a nice bath of Citristrip Paint Stripper Wash. Once she was washed down, I sanded her lightly to remove any remaining varnish and paint. Using a tack cloth I wiped her clean of any dust and then dry brushed her using a new paint brush. Look how fresh and new she looks! But the problem is I wanted her to look aged, not fresh and new. Hmmm...

Here comes the fun part! Once again I left her overnight but I wasn't chilling this time. I returned to my apartment where I tore a pad of 0000 steel wool into little pieces and placed in a pasta sauce jar that I had saved for such an occasion as this. I then covered the steel wool with white vinegar and closed it up with the lid. What is this, you ask? It's how I will give my beauty a wash that gives the wood an aged look. You see, the steel wool has a chemical reaction to the vinegar and when I brush it onto my beauty, the steel wool/vinegar mixture will oxidize her, making her look like aged and will give her a gorgeous color.

The next day, she received her stinky but wonderfully effective vinegar wash and sat to dry for a few more hours. Check out the left side area where I applied the wash! It's already working wonders.

Once she dried, I sealed her up with a paste wax following the manufacturer's instructions.

She spent one final night up on the roof before I painted her hardware black, added casters and stenciled the word "SIT". I am not sure about the SIT but I needed something to cover the wood filler the previous owner used. I might change it. Still not sure. But just look at her! Isn't she a beauty?

{Baby's got back!}
{and she's got legs..and she knows how to use them!}

As you can see, one man's trash can truly be another man's treasure! Thanks to the person who was tired of her and left her discarded in the alley. She was rescued and revived!

So what do you think? I'd love to hear from you!


xoxo, tami