Monday, February 6, 2012

Living Room: Gallery Wall

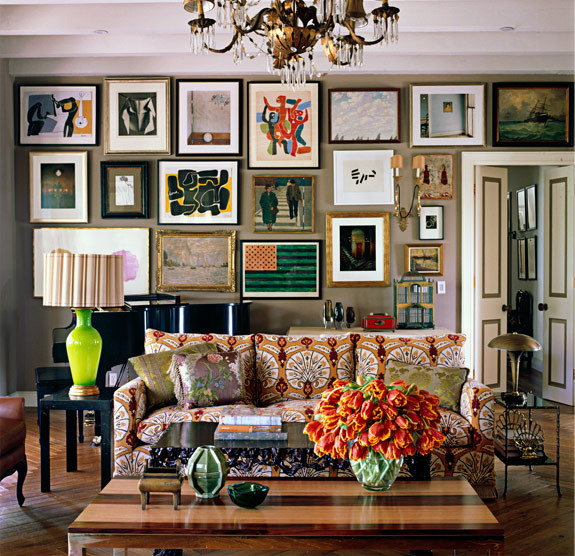
WAY back in the day, I decided I wanted to do a gallery wall in my living room, but I never actually did it. {Confession: I am a procrastinator on some things}  However, part of designing my renovated life is bringing great ideas to fruition. I think the area just left of my front door is the perfect spot for a gallery. I decided to scout the world wide web to see what I could see.  Look what I saw!

{Source} 

I especially love the ampersand, the oversized letter and the all black frames. I want to focus my collection using pieces of art, framed family photos and text. This might be a bit of a process because I am a bit picky but I am excited about this. 

Do you have a gallery wall? If so, share the link, I'd love to see it.

If you don't, what do you think about this? Seriously, I wanna know!  xoxo tami

Wednesday, February 1, 2012

TSE Wedding Event 2012

Tami Briggs of Fabulously Wed worked among a team of event designers along with Sean De Freitas with Designs by Sean to bring 2012 TSE Wedding Event to life!

I was so honored to have been chosen to work with such a fantastic team for The Wedding Event for The Special Event Conference that was held in Tampa last week. The Special Event Conference is one of the largest trade shows and conferences in the Event Planning Industry.

In this blog post I am going to take you behind the scenes to see the process of setting up an event of this magnitude. The event was held in the Expo Hall at the Florida State Fairgrounds, and it took us 4 long days and nights to install this event. This has been the most challenging event I have worked on; and we executed it flawlessly.

The Expo Hall is an 88,000 square foot space. We transformed and brought in this space creating walls to the size and look of an elegant ballroom for 700 guests.

The Floor Plan
Day 1- unloading the trucks…
Building the truss…

Setting up the floral designers area. We had 4 designers; their teams set up 4 work stations and began to lay out their vases and process their flowers…
Day 2 – Building the 100 ft. long chandelier…
Setting up the cocktail area…
More flowers arrive…
Begin to design the centerpieces…
Day 3 – truss goes up and start laying tables…
Finish setting tables…
We had four looks inside the ballroom this is:
Earthly Glitz
Moroccan Vintage
Modern Organic
Country Chic
The stage begins to be built…
The stage- finished product
Day 4 – final tweaks and event day!
One of the cocktail hour vignettes- Moroccan Vintage
Cocktail area
Cocktail area – Opera singer in the 80-foot red dress (Dramatic)

The finished look inside the main dining room
This was such a challenging and fun project to execute - there were over 50 vendors who helped pull this event off!!! 

To wrap up this blog post, I want to share an amateur video I put together using pictures and video from my handy dandy iPhone!    Enjoy...


xoxo, tami

Monday, January 30, 2012

Living Room: Curtains

If you have been following along, you will know that my living room is unusually dark because we have a very tall brick building mere feet away from our living room, kitchen and bathroom windows. Alas, most of the time our place is very dark and requires constant electric lighting. For now, we illuminate the living room using the lamp on our ceiling fan, but my goal is to eventually strategically add lamps and sconces to warm up the place and perhaps add some mirrors so the light has something to bounce off of.

Suffice it to say, I really pondered the type of window coverings I should use. Currently the windows have metal mini blinds in ivory. They are great for keeping the neighbors out of our beeswax, but during the day, when the room begs for natural lighting, we want to open them to allow what little light we can into the room, but still have some privacy.

My initial idea as to simply put up sheers. However, the only sheers that would even attempt to allow in the light we get would need to be white. I am not exactly fond of windows covered in white sheers. It says "cheapskate" to me in a space that is supposed to be City Girl Chic. After a little hemming and hawing, I decided to go with aubergine taffeta curtains with white sheers underneath. The blinds will remain up but on the days we want to open the blinds for light, the sheers will give us some privacy and the taffeta curtains are also great for adding a bit of privacy and an element of glam to the look of our room.

Although I can score inexpensive white sheers at Walmart, I cannot find aubergine taffeta drapes to save my little life, so I will be DIYing them. The only decision now is what type of drapes shall I craft.

I love the idea of the fabric puddling on the floor. Below is an example of a basic drape shirred onto a curtain rod. This is one option and the easiest to create.

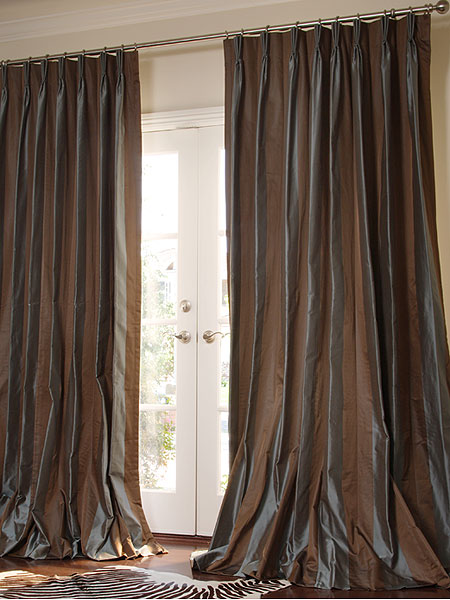
Next is the pleated drape. I really love how this looks, but I will need to study the methodology for this type of drape as it requires pleating hooks and additional sewing and measuring.

Then there is the grommeted drape which is very contemporary and may go well with the City Girl Chic vibe but also requires a bit more skill level and a few more tools. If I make the grommeted drapes, I will not puddle the fabric onto the floor as this is a more polished look. Aren't these pretty? The pattern and color of this material doesn't really go with my look but I do appreciate them.

So what do you think? Shall I go with shirred, pleated or grommeted?